
MythTV Media Computer
Overview
After getting a HDTV, a new MythTV frontend computer was in order to make the best use of it.
Most "media" or "entertainment" computers that can be found elsewhere on the web are usually way over powered, have only minor consideration to noise or power consumption, and try to cram too many features into something that should look like a DVD player or set-top box.
MythTV allows for a split frontend/backend model where the backend does scheduling, recording, and storage of shows and the frontend provides the user interaction and playback. The frontend requirements aren't very high, all that's needed is a mid-range CPU, some RAM, low to mid-range graphics and a network connection to the backend. The ideal system should fill just those requirements and not much else to keep everything simple.
Requirements
- Quiet. Preferably no fans or moving parts under typical operation.
- Low power CPU.
- Integrated graphics. Preferably with DVI output in addition to VGA.
- 256MB or 512MB RAM
- No hard drive
- Digital audio output
- DVD ROM for playing DVD movies
- Form factor similar to consumer DVD player or other AV equipment
Component Selection
Motherboard / CPU
The size and expansion of an ATX motherboard is just too much for this system. Both Micro-ATX and Mini-ITX motherboards are a better alternative. For CPUs, a Pentium M, Turon, or VIA CPU are all sufficient.
I settled on a VIA EPIA SP13000 (top of the line VIA Motherboard at the time). This Motherboard features:
- Mini-ITX form factor
- VIA 1333 Mhz C3 (Nehemiah) CPU
- VIA CN400 Northbridge with integrated S3 Unichrome Pro graphics
- VIA VT8237 Southbridge
- VIA VT6307S IEEE 1394
- VIA VT1211 SuperIO
- VIA VT1623 TV Encoder
- VIA VT1617A Audio
- 1 DDR266/333/400 DIMM
- 1 32bit/33Mhz 5V PCI slot
- 2 PATA 133 connectors
- 2 SATA 150 connectors
- USB 2.0, 2 PS2, 1 100Base-T, VGA, Digital Audio out, etc...
The SP13000 is sold with an active cooling solution for the CPU which is simply unacceptable and needs replacing. The motherboard also doesn't have a DVI output, just VGA, composite, and S-Video. VIA does make a DVI add on riser card for the SP series similar to 'ADD' cards found on other motherboards. This add-on card plugs into the LVDS connector on the motherboard however I couldn't find anyone that sells it in the US.
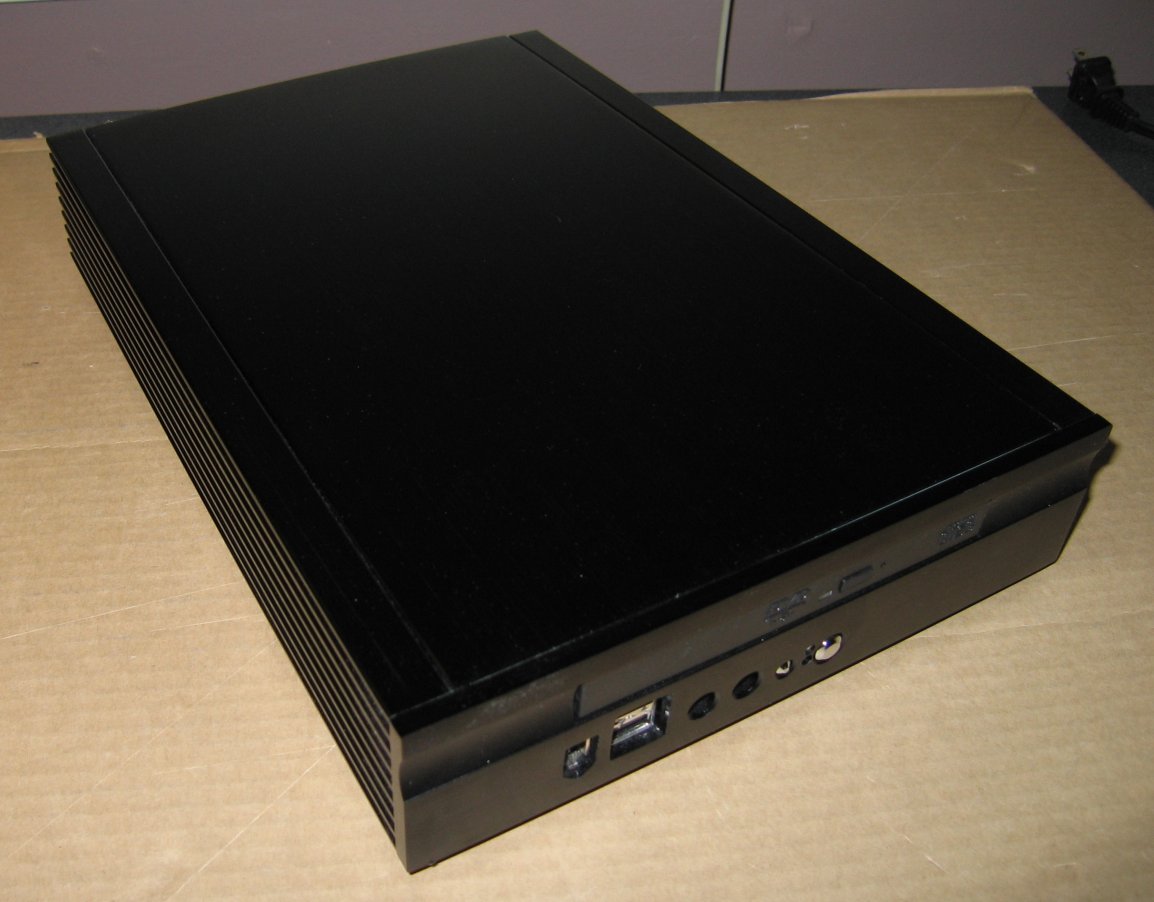
Enclosure
There is quite a bit of selection to choose from. The Mini-ITX form-factor has driven the development for a wide variety of cases ranging from thin clients, in-car PCs, to media PCs. In addition, there is a set of cases targeting the more traditional all-in-one media center PC. Unfortunately these are usually very large and crammed full of expansion bays, a fancy LCD or VFD display, fans, and a high output power supply.
The VIA SP13000 draws just 15-40W max. Without fans, hard drives, and expansion cards the power needs are very low. I ended up with 2 candidates enclosures:
The SilverStone LC-11 is an interesting enclosure. It's unconventional up-side-down motherboard placement, use of well placed low-rpm 80mm fans (60mm fans are evil!), low profile, and overall look made me like it alot. It can take a Mini-ITX or Micro-ATX motherboard. This would be a great enclosure for a Micro-ATX Pentium-M or Turon based system.
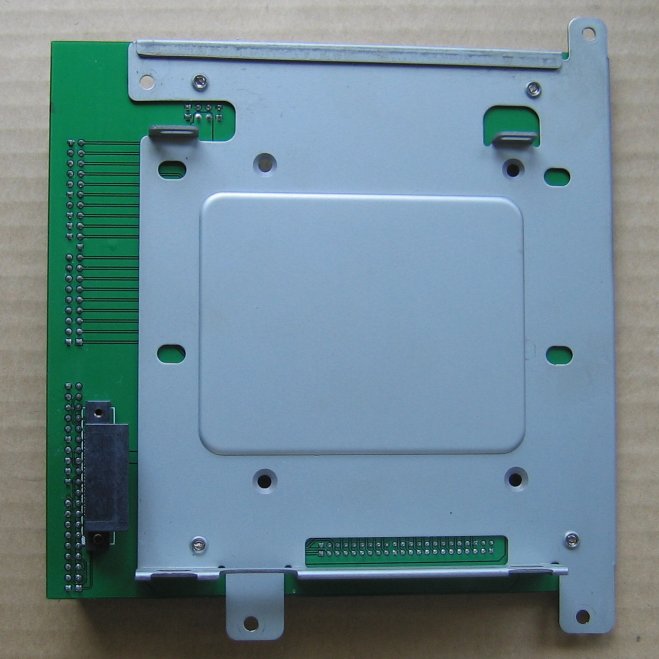
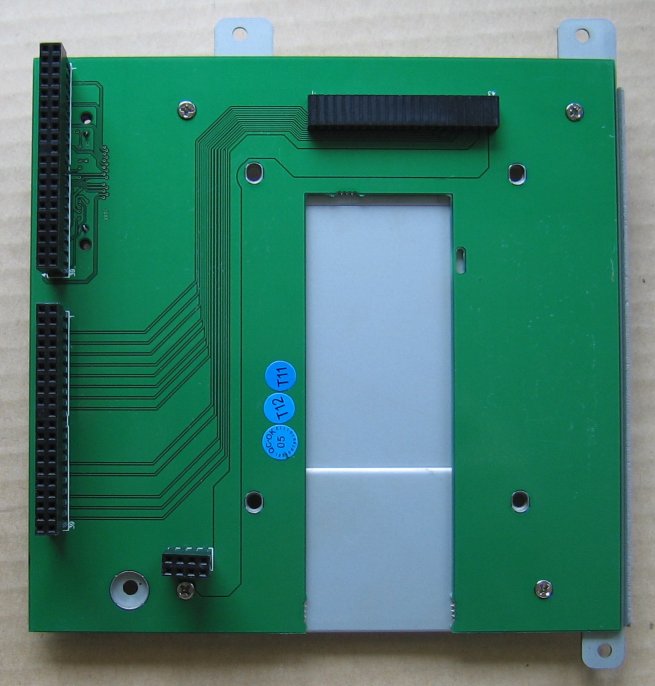
The Serener GS-LO1 was my other choice. It's use of an internal DC-DC power supply with external fanless 120W power brick are nice and keeps part of the power supply heat outside of the case. The most important part of the case is it's fanless heat-pipe design. Made specifically for the EPIA motherboard series the enclosure includes replacement passive heat-sink/pipes for the motherboard. The enclosure includes a custom mounting tray for a 2.5" HD and slim CD/DVD drive. The tray has 2 40pin PATA connectors positioned to plug directly into many EPIA motherboard and a custom connector that plugs directly into the power supply eliminating cables completely! Unfortunately the SP series EPIA motherboards have the PATA connectors in a different location than earlier motherboards so the tray can be used, but with cables.
I almost selected the SilverStone case until I realized how deep it is. It would hit the back of the shelf under my TV and extend out over the front of the shelf more than an inch. I settled on the Serener case instead.
Other parts
A spare 512MB DDR-1 DIMM from the bin of spare computer parts was fine. A slim Toshiba DVD-ROM (model SD-C2712) with black faceplate was selected and because the enclosure's tray isn't compatible with the SP motherboard's PATA connector placement a slim-DVD adaptor bracket is needed. Add a wireless keyboard and mouse and that's it.
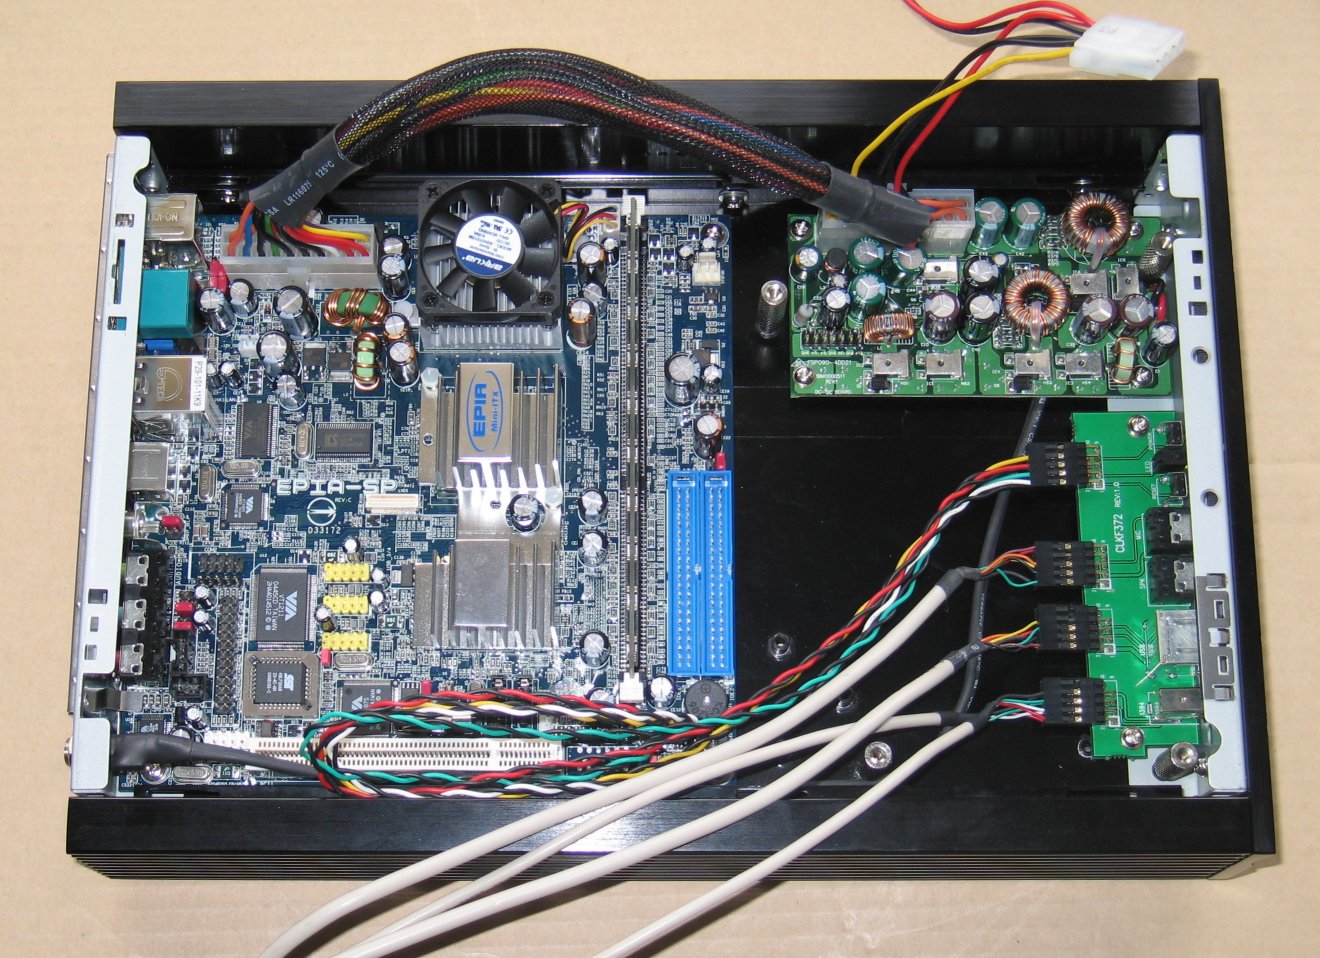
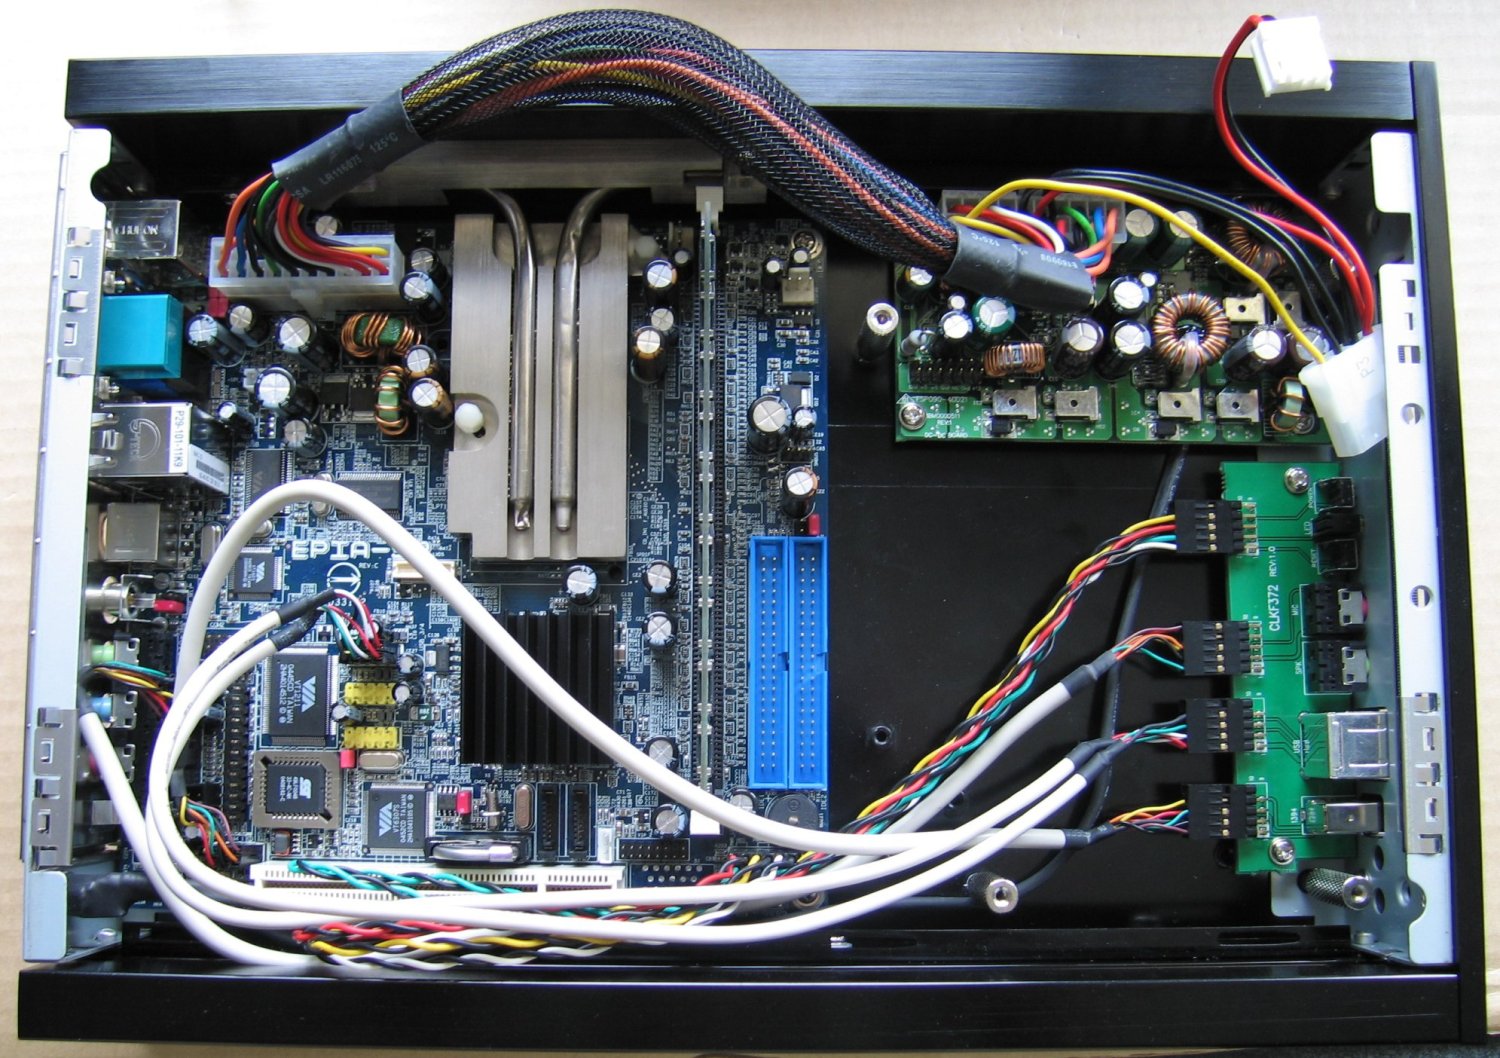
Assembly
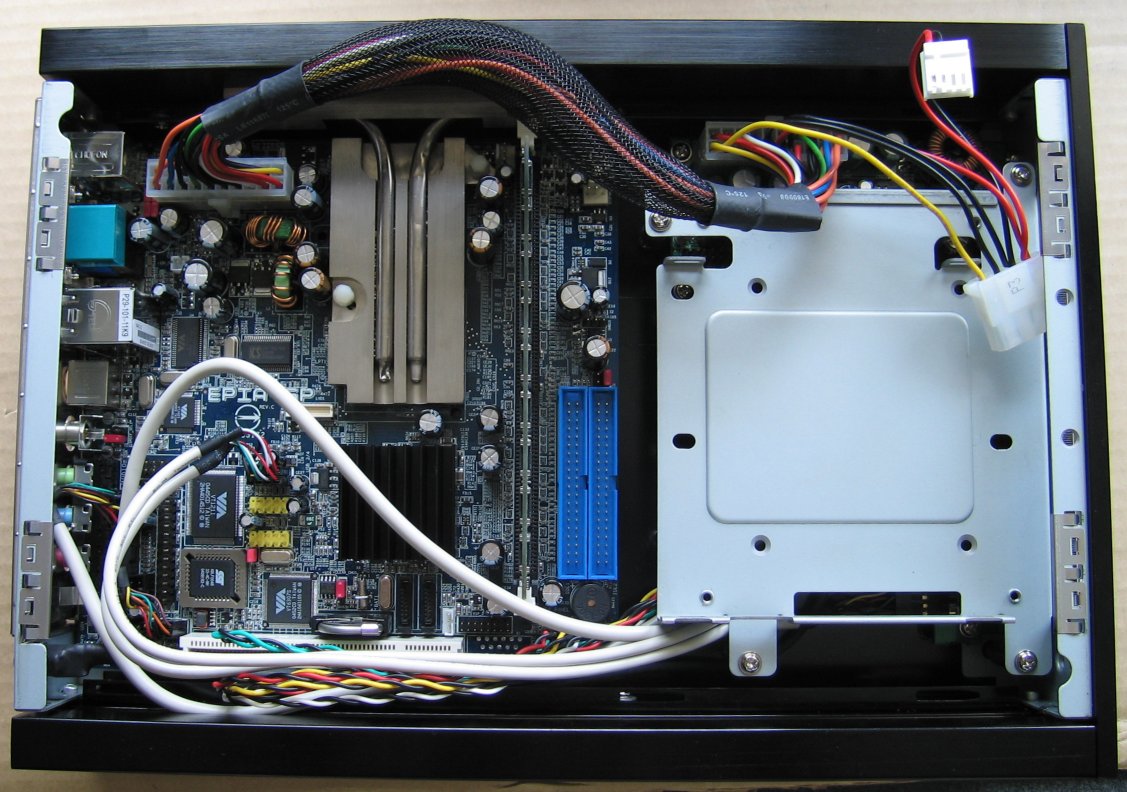
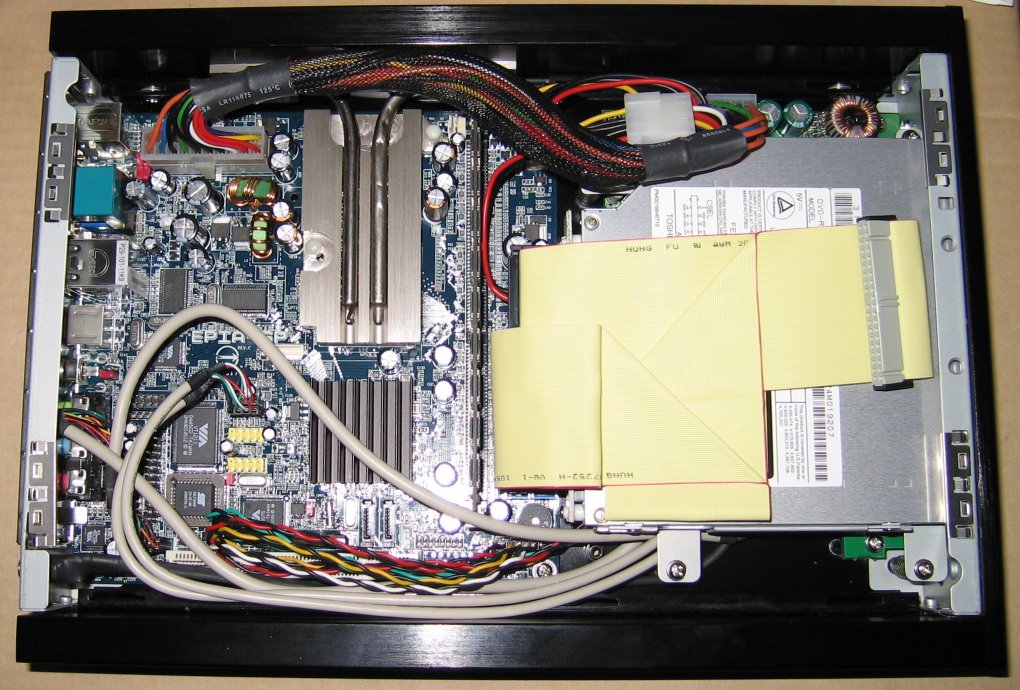
The enclosure places the motherboard at the back. The DVD/HD tray has been removed the reveal the front-panel PCB and DC-DC power supply at the front of the case. The DC-DC power supply includes a 20-pin ATX power connector, one large 4-pin, and one small 4-pin connector (which only has 5V). The main 20-pin cable is reversible so the 4-pin connectors can attach to either end. A small black DC power cable runs to the back left of the case. The front panel PCB includes a 1394 port, 2 USB, audio, power LED, disk LED, reset and power buttons. The enclosure includes a 120W 19V DC power brick. It is passively cooled and sealed (no vents).
 |
 |
 |
| EPIA SP13000 with stock cooling | Rough fit in the enclosure | The enclosure's power brick |
First step, remove the CPU's heat-sink/fan as well as the North and South bridge heat-sink.
The enclosure includes a stick-on passive heat-sink for the south bridge and the larger heat-sink/heat-pipe attaches to both the northbridge and CPU. The NB/CPU heat-sink is held to onto the motherboard with two plastic tabs that snap into the motherboard's existing mounting holes. The heat-pipes are connected to another block that screws into the side of the case. You need to attach the heat-sinks to the motherboard first, then place everything into the enclosure. This is very difficult as the heat-pipes hit the side of the case as you slide it into a horizontal slot in the side of the case.
WARNING: I suspect that once installed it will be impossible to remove the motherboard from the case without causing damage. I haven't tried this yet, but the plastic tabs that keep the heat-sink attached to the motherboard can only be released by pinching them from underneath the motherboard. In addition, the heat-pipes snap into a slot on the side of the case. It's unfortunate Serener make the motherboard this difficult to install and remove.
 |
 |
| Heat-sinks removed | SP13000 installed in enclosure |
As expected the included HD/DVD tray doesn't line up with the PATA ports on the SP so it's off with the tray's PCB leaving just the metal part. Install the DVD drive, attach power and a PATA cable and that's it. Note the the PATA cable is a tight fit considering the connectors on the motherboard and bracket are offset by about an inch and reversed making for some creative folding. The tray's PCB is a great design idea but it's too bad it can't be used with the SP.
 |
 |
 |
| Tray is incompatible with SP13000 | Top of the tray (DVD/CD) | Bottom of the tray (2.5" HD) |
 |
 |
| PCB removed from tray | DVD drive installed |
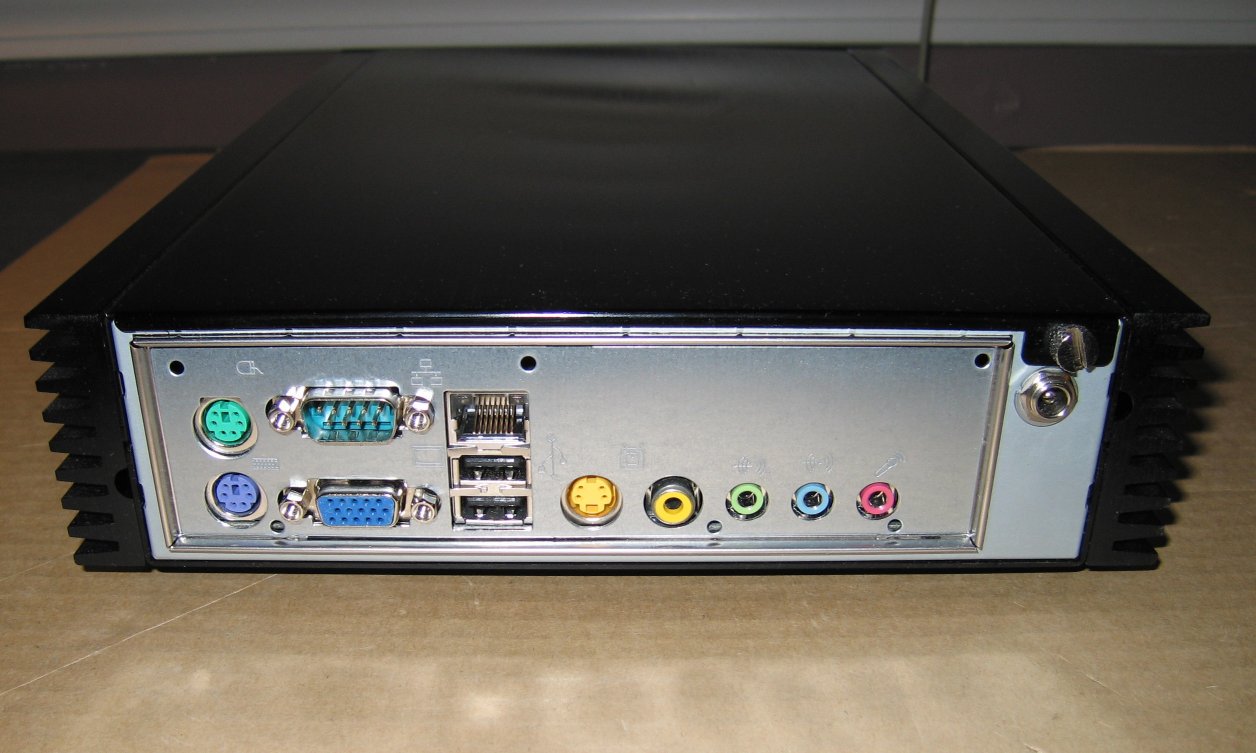
On with the top of the case and assembly is complete. The SP13000's IO panel includes a full set of analog audio ports, a RCA output port for either digital audio or composite video, S-Video out, 2 USB, Ethernet, VGA, RS232 and 2 PS2 ports.
 |
 |
| Assembly complete | The rear IO ports |
Installation was easy. I needed to connect the power brick, VGA to the TV, LAN, wireless keyboard and mouse to the PS2 ports, and both analog and digital audio to the receiver.
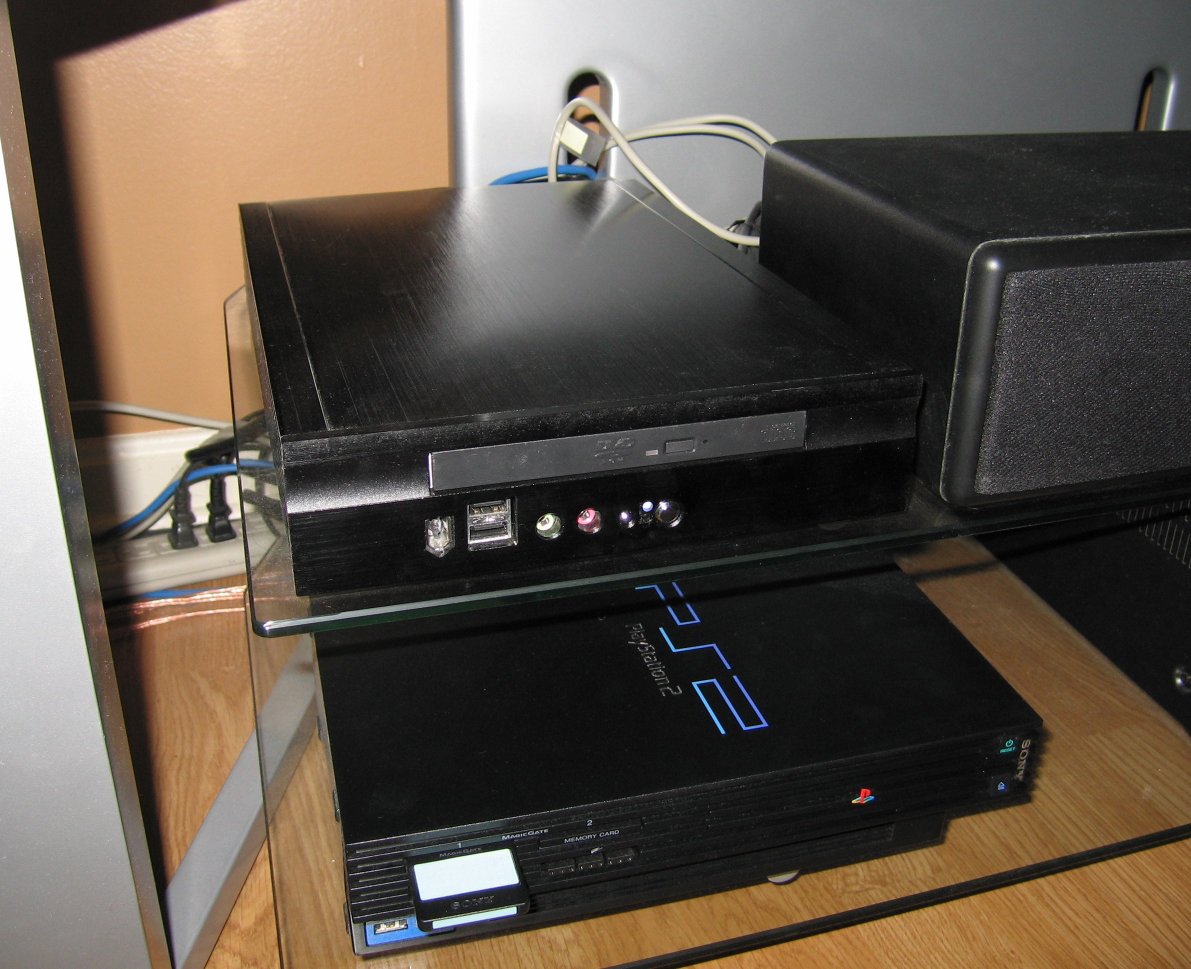 |
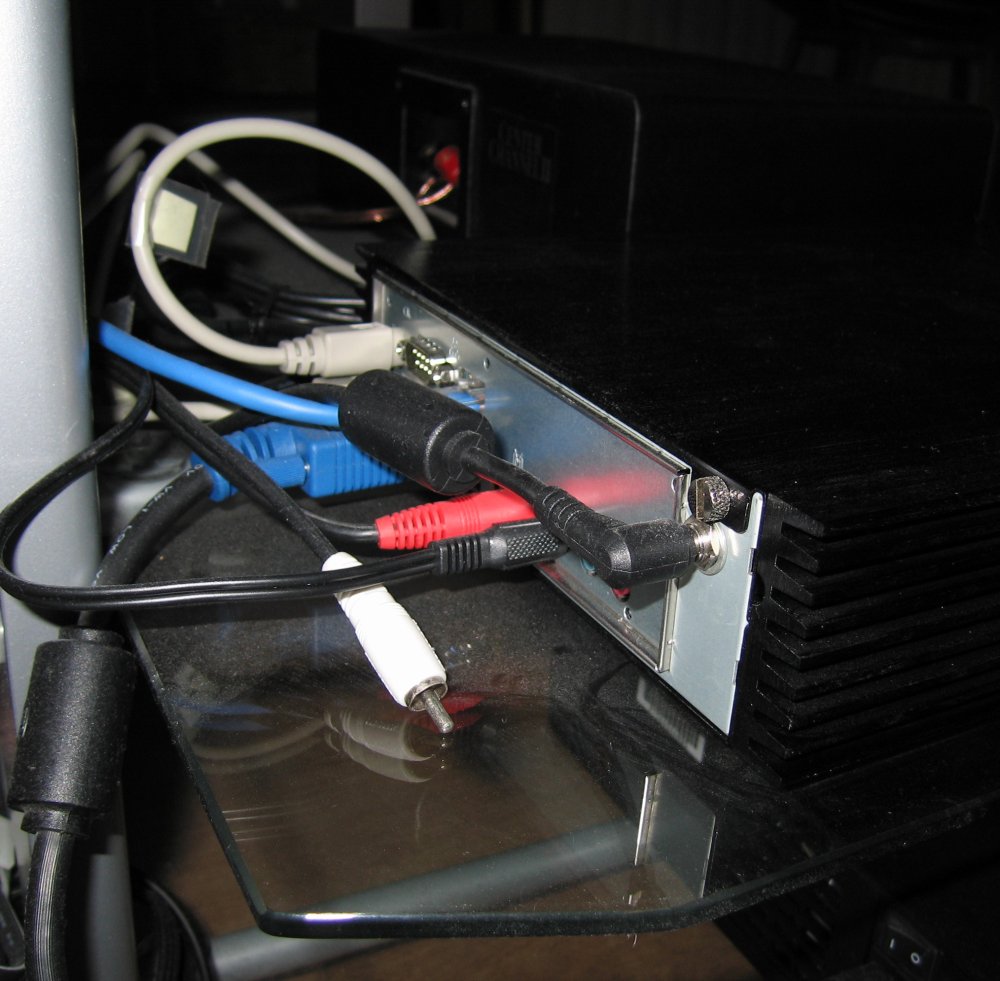 |
| Installed under TV | Rear connections |
Setup
Booting
The SP13000 can network boot using a PXE ROM. Select LAN boot from the BIOS config and it boots by first DHCP'ing and then obtaining boot code via TFTP using information in the DHCP response. The boot code then TFTP's a kernel and executes it. Use NFS for a root filesystem and no hard drive or flash media is needed to boot or run.
OS Install and Graphics
The system was setup with a Debian GNU/Linux install and 2.6.12 Linux kernel. XFree86 4.3.0 with a Unichrome PRO CVS snapshot driver was needed. The TV is connected via a VGA cable allowing the machine to output the TV's native resolution of 1280x720@60Hz. The VIA integrated graphics can output this resolution but it's not in the list of VESA resolutions are presented to the X driver by default. An additional ModeLine directive was needed in the XF86Config-4 file to output 1280x720@60Hz.
| Custom ModeLine in XF86Config-4 | |
ModeLine "1280x720" 74.50 1280 1344 1472 1664 720 723 728 748 +hsync +vsync |
|
| XF86 can even detect the TV's characteristics over the VGA cable | |
(II) VIA(0): Manufacturer: SAM Model: 1a6 Serial#: 0 (II) VIA(0): Year: 2005 Week: 10 (II) VIA(0): EDID Version: 1.3 (II) VIA(0): Analog Display Input, Input Voltage Level: 0.700/0.700 V (II) VIA(0): Sync: Separate (II) VIA(0): Max H-Image Size [cm]: horiz.: 110 vert.: 62 (II) VIA(0): Gamma: 2.20 (II) VIA(0): No DPMS capabilities specified; RGB/Color Display (II) VIA(0): First detailed timing is preferred mode (II) VIA(0): redX: 0.640 redY: 0.330 greenX: 0.300 greenY: 0.600 (II) VIA(0): blueX: 0.150 blueY: 0.060 whiteX: 0.312 whiteY: 0.329 [...] (II) VIA(0): Supported Future Video Modes: (II) VIA(0): #0: hsize: 640 vsize 480 refresh: 85 vid: 22833 (II) VIA(0): #1: hsize: 800 vsize 600 refresh: 85 vid: 22853 (II) VIA(0): Supported additional Video Mode: (II) VIA(0): clock: 74.5 MHz Image Size: 1107 x 623 mm (II) VIA(0): h_active: 1280 h_sync: 1344 h_sync_end 1472 h_blank_end 1664 h_border: 0 (II) VIA(0): v_active: 720 v_sync: 723 v_sync_end 728 v_blanking: 748 v_border: 0 (II) VIA(0): Supported additional Video Mode: (II) VIA(0): clock: 65.0 MHz Image Size: 1107 x 623 mm (II) VIA(0): h_active: 1024 h_sync: 1048 h_sync_end 1184 h_blank_end 1344 h_border: 0 (II) VIA(0): v_active: 768 v_sync: 771 v_sync_end 777 v_blanking: 806 v_border: 0 (II) VIA(0): Monitor name: SAMSUNG (II) VIA(0): Ranges: V min: 56 V max: 85 Hz, H min: 30 H max: 61 kHz, PixClock max 80 MHz |
|
| EPIA SP13000 PCI Tree | |
$ lspci -vt
-[00]-+-00.0  VIA Technologies, Inc. CN400/PM880 Host Bridge
      +-00.1  VIA Technologies, Inc. CN400/PM880 Host Bridge
      +-00.2  VIA Technologies, Inc. CN400/PM880 Host Bridge
      +-00.3  VIA Technologies, Inc. CN400/PM880 Host Bridge
      +-00.4  VIA Technologies, Inc. CN400/PM880 Host Bridge
      +-00.7  VIA Technologies, Inc. CN400/PM880 Host Bridge
      +-01.0-[01]----00.0  VIA Technologies, Inc. S3 Unichrome Pro VGA Adapter
      +-0d.0  VIA Technologies, Inc. IEEE 1394 Host Controller
      +-0f.0  VIA Technologies, Inc. VIA VT6420 SATA RAID Controller
      +-0f.1  VIA Technologies, Inc. VT82C586A/B/VT82C686/A/B/VT823x/A/C PIPC Bus Master IDE
      +-10.0  VIA Technologies, Inc. VT82xxxxx UHCI USB 1.1 Controller
      +-10.1  VIA Technologies, Inc. VT82xxxxx UHCI USB 1.1 Controller
      +-10.2  VIA Technologies, Inc. VT82xxxxx UHCI USB 1.1 Controller
      +-10.3  VIA Technologies, Inc. VT82xxxxx UHCI USB 1.1 Controller
      +-10.4  VIA Technologies, Inc. USB 2.0
      +-11.0  VIA Technologies, Inc. VT8237 ISA bridge [KT600/K8T800/K8T890 South]
      +-11.5  VIA Technologies, Inc. VT8233/A/8235/8237 AC97 Audio Controller
\-12.0 VIA Technologies, Inc. VT6102 [Rhine-II] |
$ lspci -vtn
-[00]-+-00.0  1106:0259
      +-00.1  1106:1259
      +-00.2  1106:2259
      +-00.3  1106:3259
      +-00.4  1106:4259
      +-00.7  1106:7259
      +-01.0-[01]----00.0  1106:3118
      +-0d.0  1106:3044
      +-0f.0  1106:3149
      +-0f.1  1106:0571
      +-10.0  1106:3038
      +-10.1  1106:3038
      +-10.2  1106:3038
      +-10.3  1106:3038
      +-10.4  1106:3104
      +-11.0  1106:3227
      +-11.5  1106:3059
\-12.0 1106:3065 |
 |
 |
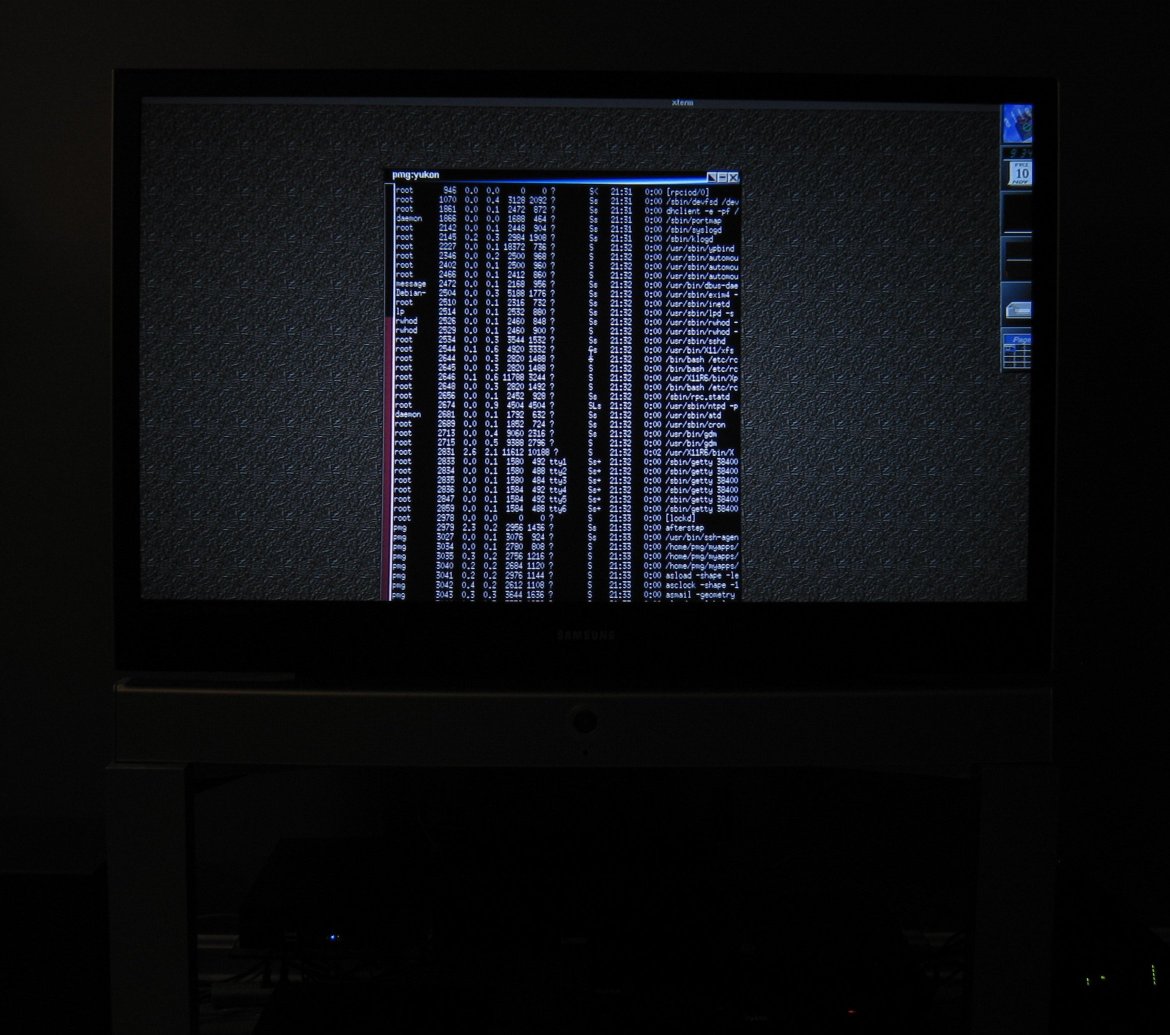 |
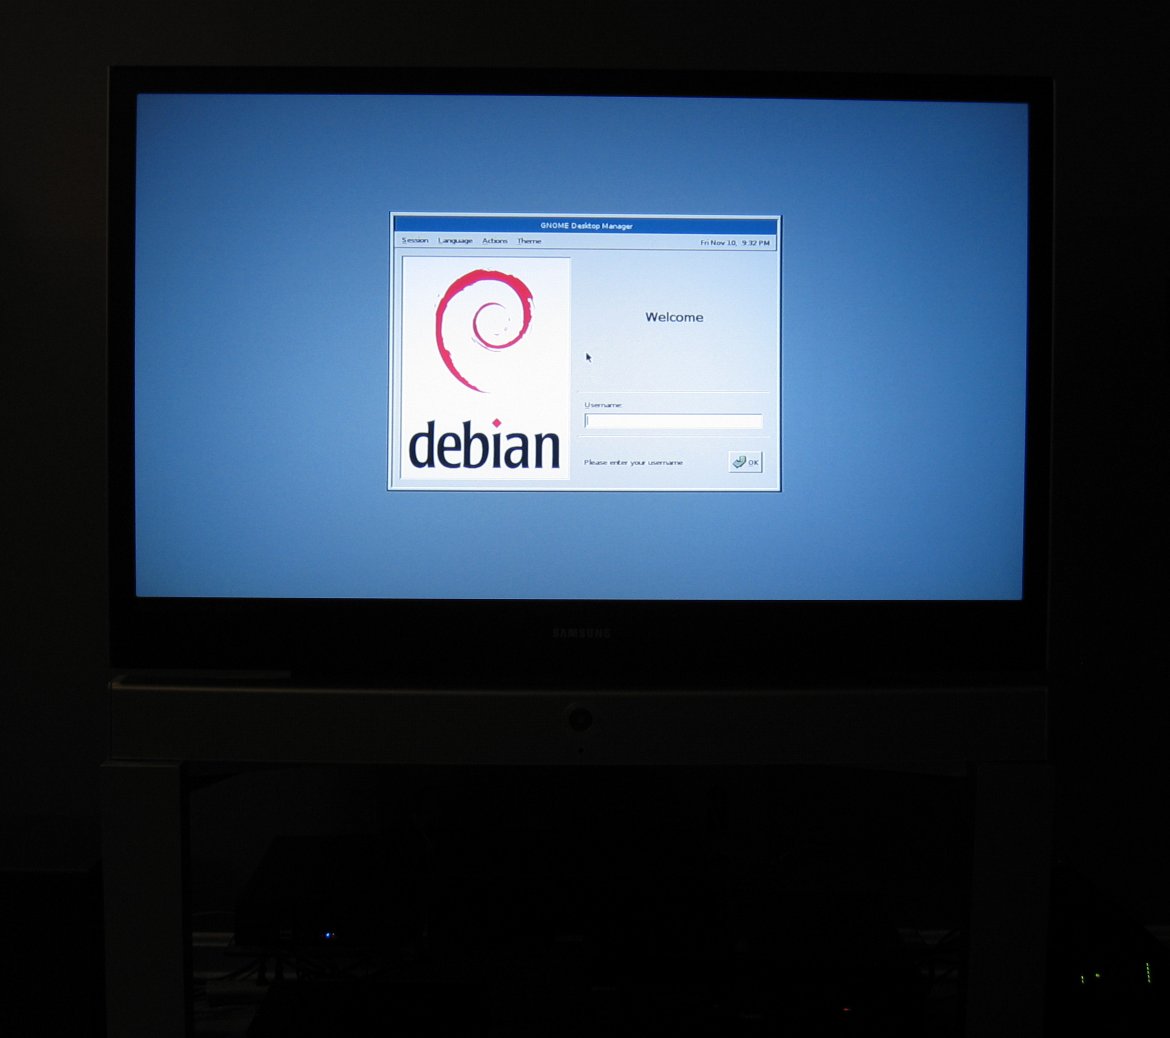
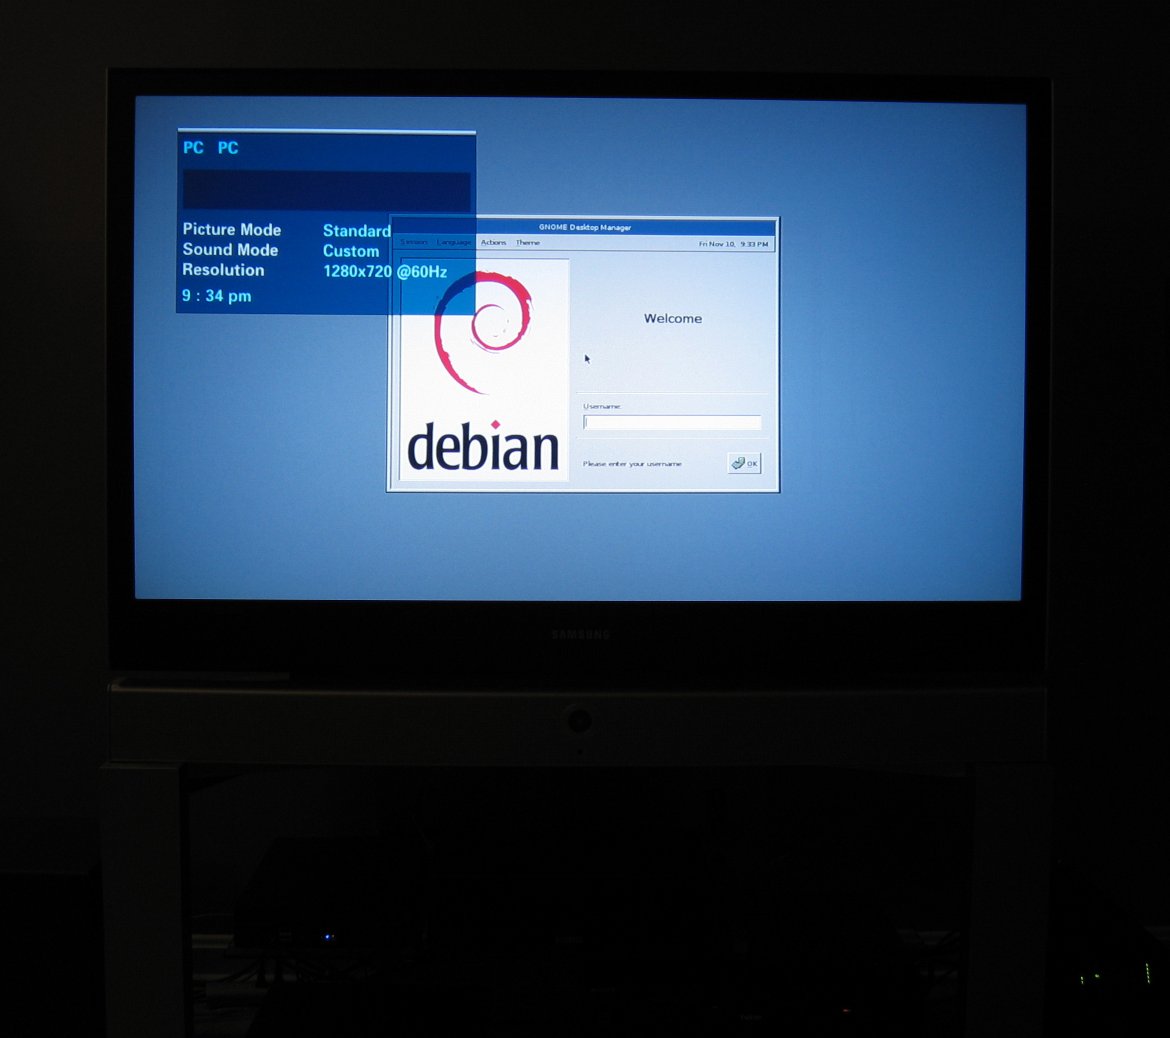
| Nothing like logging into the TV | Overlay is from the TV's menus | Yes, it's a real computer |
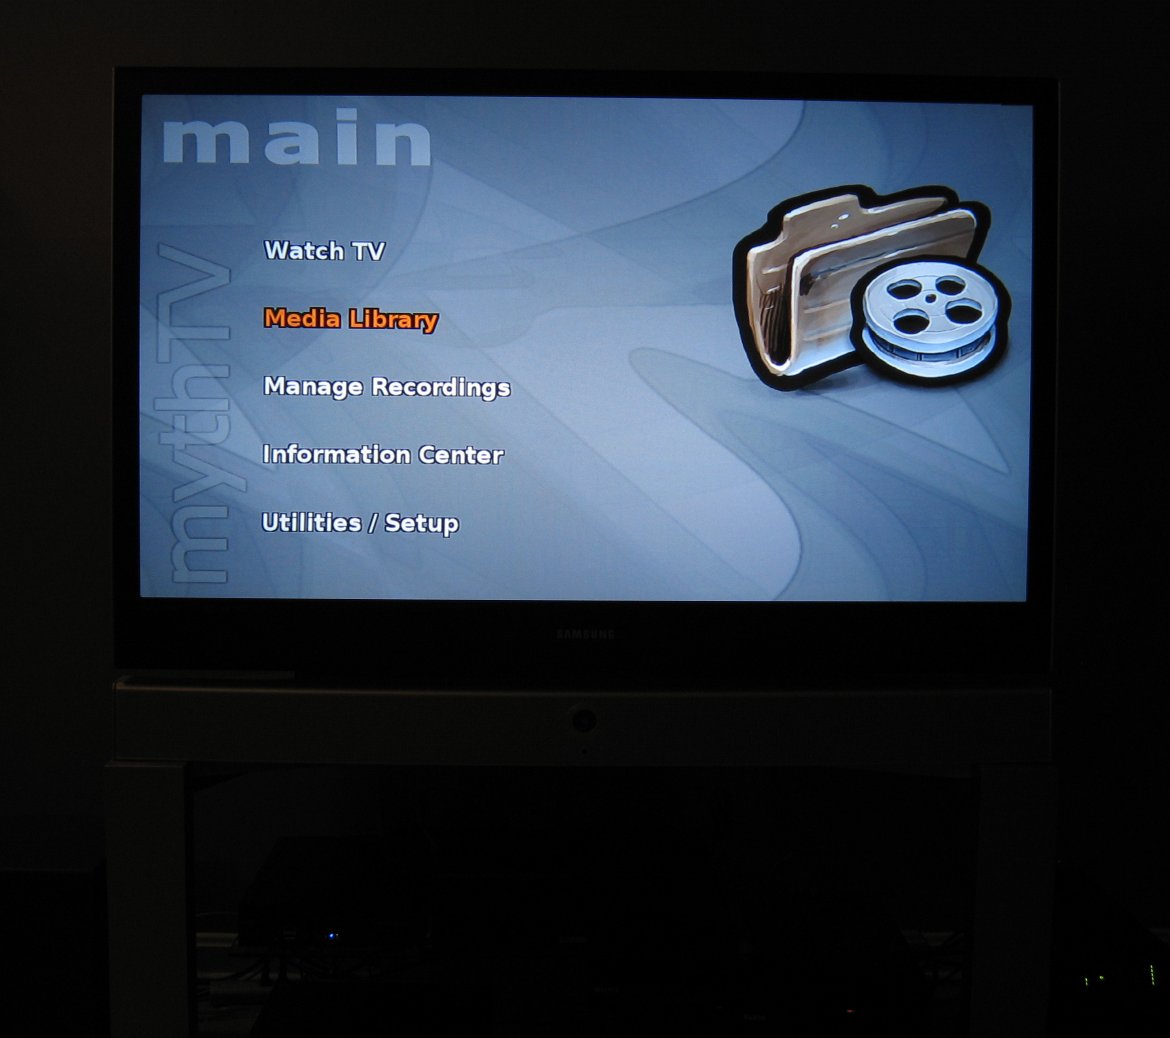
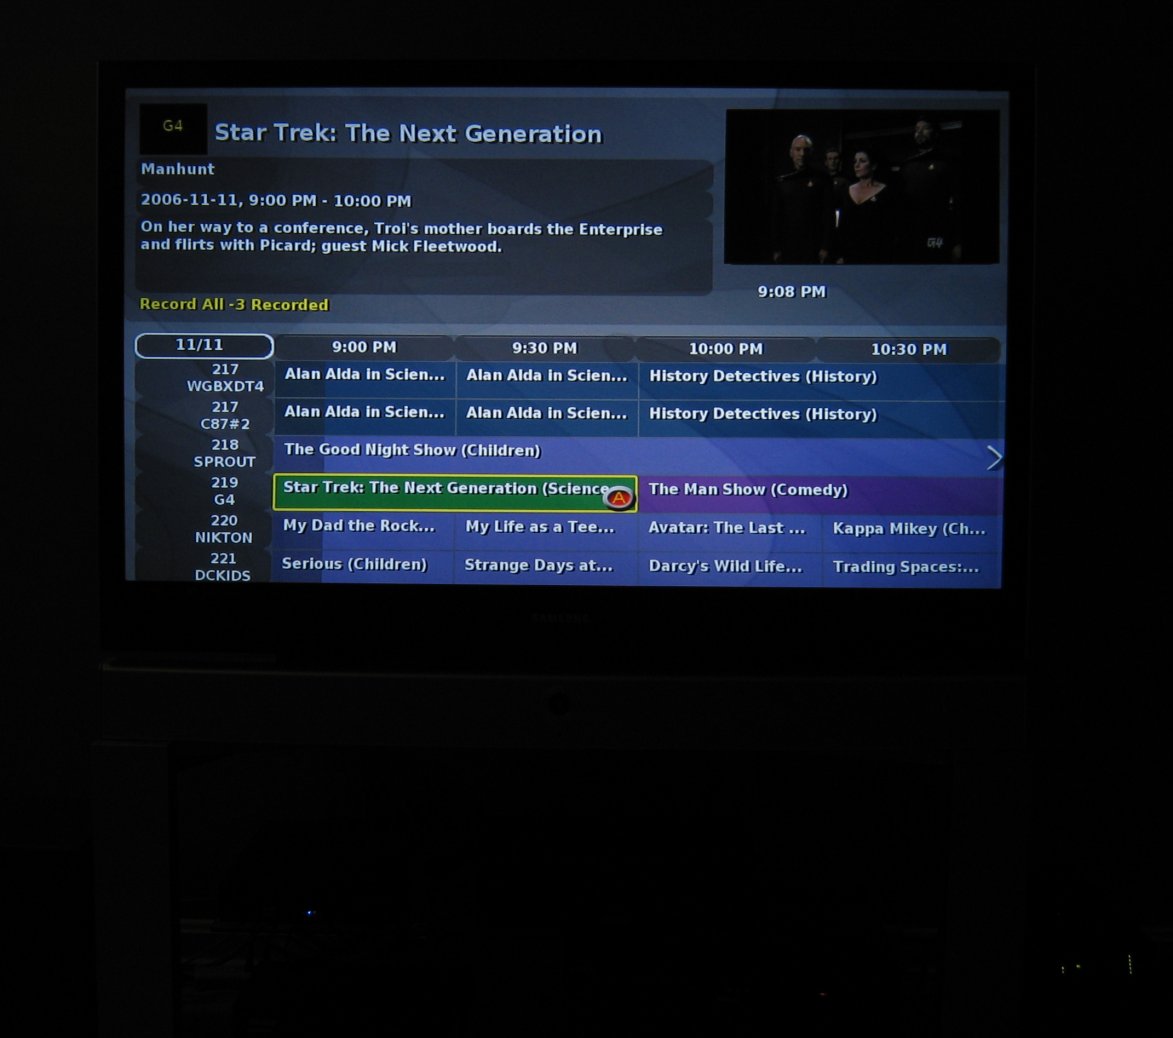
MythTV
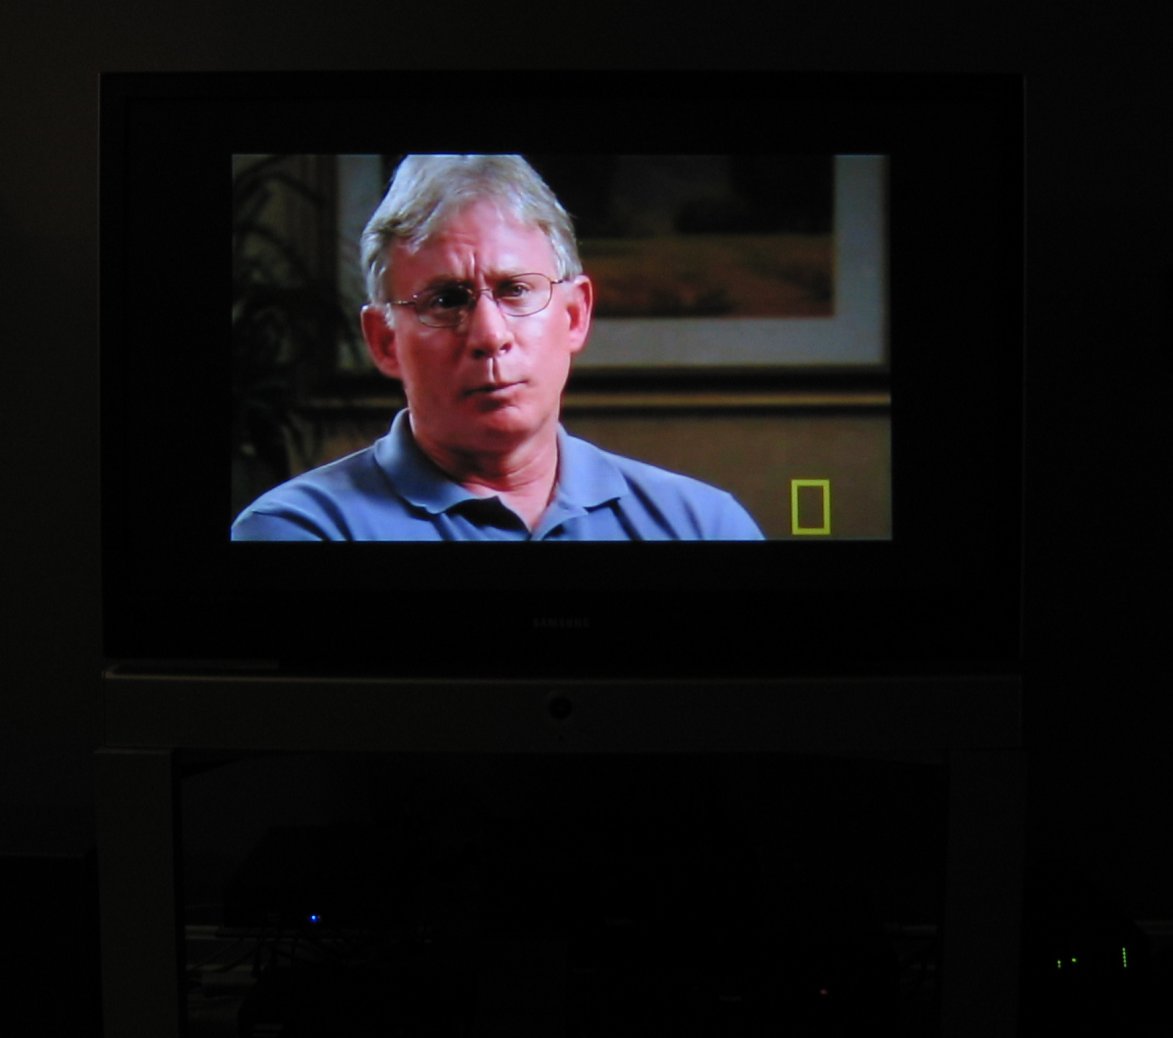
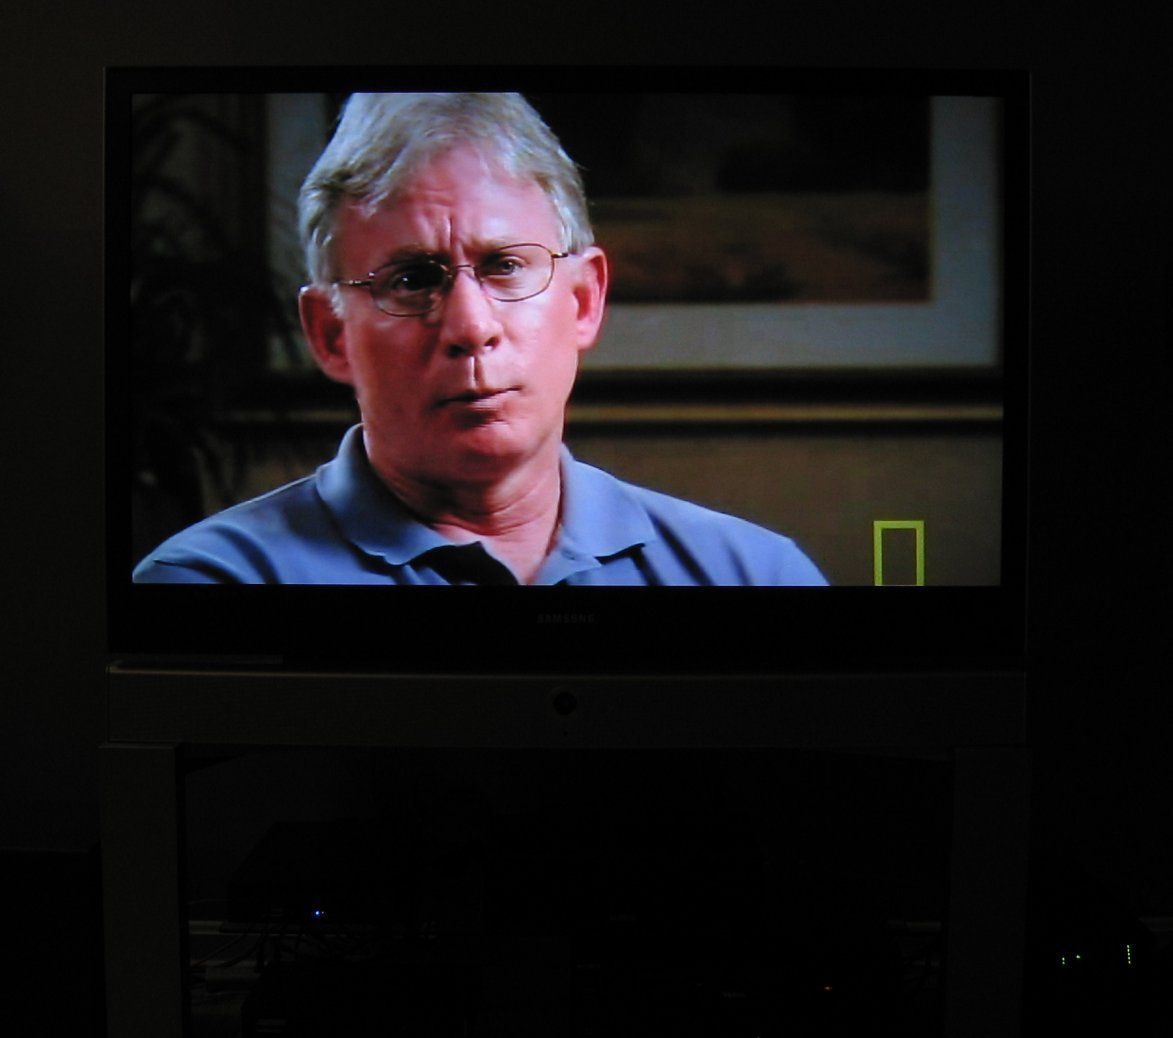
MythTV's frontend was installed. Communication to the backend is done over the LAN. The frontend menus fill the full screen at 1280x720 resolution.
 |
 |
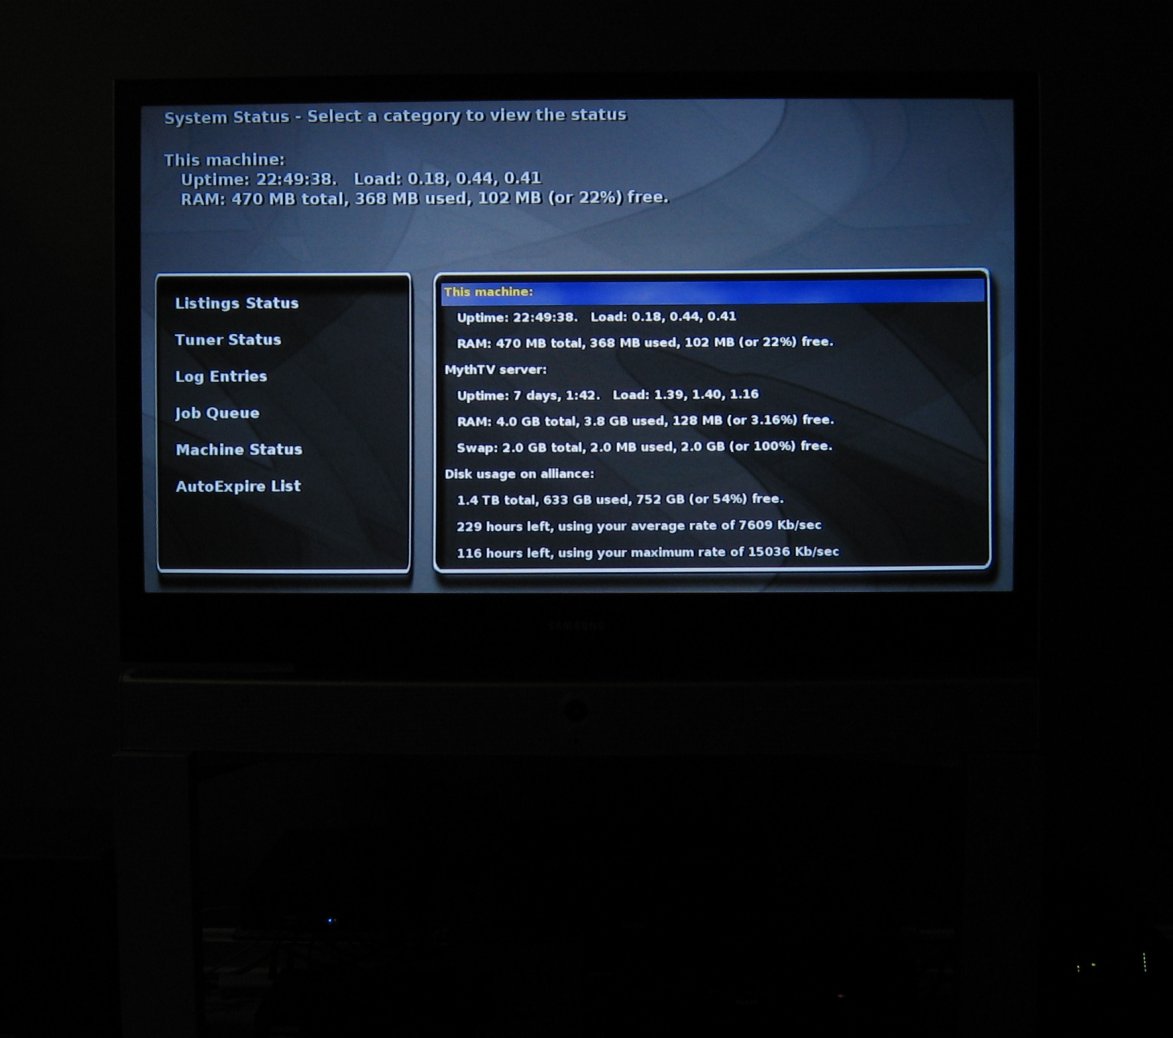 |
| Main menu | Live TV and program guide | Status of frontend and backend |
When viewing 4:3 480i content MythTV can either display it as 960x720 with black bars on each side or can zoom (preserving aspect ratio) or stretch (distort) to fill the screen. You can switch modes while viewing with the 'w' key. This is useful if a 16:9 production is broadcast in 4:3 with black bars on the top and bottom of the 480i broadcast (making it 360i). In the default mode MythTV will add more black bars on the side producing a black box on all 4 sides. When this is encountered you can switch MythTV into "4:3 zoom" and it will expand the 16:9 360i data to fill the full 16:9 720p screen. This crops off the broadcasted black bars at the top and bottom.
 |
 |
 |
 |
|
| A normal HD recording in: 16:9 1080i out: 1280x720 |
A normal SD recording in: 4:3 480i out: 960x720 (w/ bars) |
16:9 content broadcast in SD in: 4:3 480i (16:9 at 360i) out: 960x720 (16:9 at 960x540) |
MythTV's "4:3 zoom" mode in: 4:3 480i (16:9 at 360i) out: 1280x720 (16:9 at 1280x720) |
Performance, Power Consumption, and Cooling
Power consumption was measured at the A/C outlet using a P3 International Kill-A-Watt power meter to capture the full power consumption including power brick and internal DC-DC supply. CPU usage was measured using top. CPU temperature was read from the vt1211 SuperIO sensors once steady state was reached.
| What | CPU Usage | CPU Temperature | Watts | VA | PF |
| Standby | 2 W | 3 VA | 0.69 | ||
| Idle running X | 1 % | 44 C | 19 W | 19 VA | 0.99 |
| MythTV Frontend *1 | 47 % | 60 C | 25 W | 26 VA | 0.97 |
| Xine DVD *2 | 43 % | 60 C | 26 W | 27 VA | 0.95 |
| Full CPU | 100 % | 79 C | 30 W | 31 VA | 0.95 |
*1 Frontend was playing a recorded MPEG2 video at 7000 kbps, upscaled from 528x480i to 960x720p at 30fps.
*2 Xine was used to play a DVD from the DVD ROM. Xine was running in full screen mode upscaling the MPEG2 video to 1280x720p resolution.
The first thing to notice is the power brick appears to have power factor correction given the excellent power factor measurements of >0.95. While on, the entire system draws between 19W and 30W depending on CPU usage. At full CPU usage the 79 C CPU temperature is higher than I'd like but given that the 2 typical uses run the CPU at only 50% this isn't likely to be a problem. The 79 C reading was only reached after running the CPU at 100% continuously for more than a minute.
Displaying HDTV content through MythTV is a bit choppy and the CPU hits 100% usage. I suspect the pre-release CVS snapshot Unichrome Pro X driver is to blame. Unichrome Pro isn't supported in the normal XF86 or X.org distribution which makes using this chipset quite a hassle.
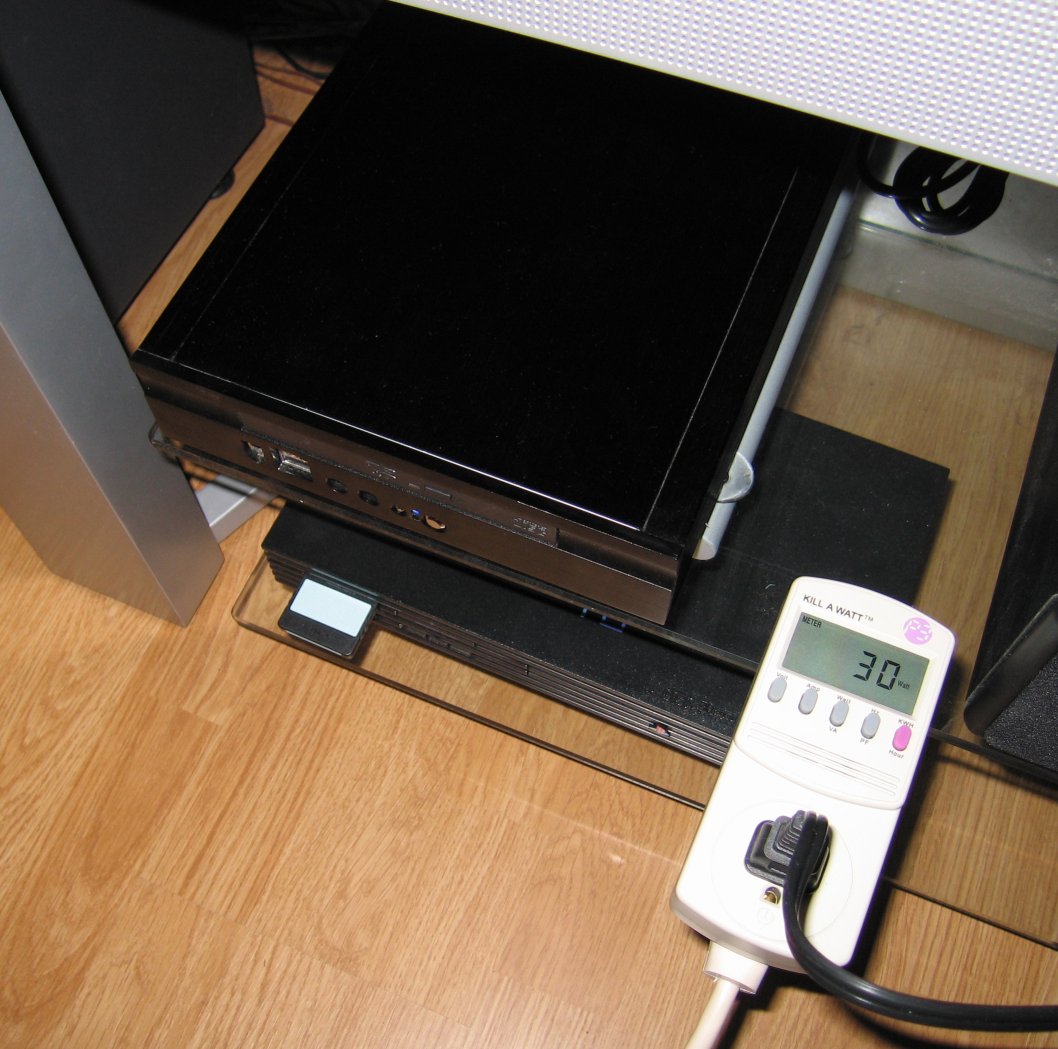 |
| Power consumption at full load |